how to create an ftp account and connect to your website
step 1
login to yourhttps://my.design.gardenaccount (instructions here:logging in to cpanel)
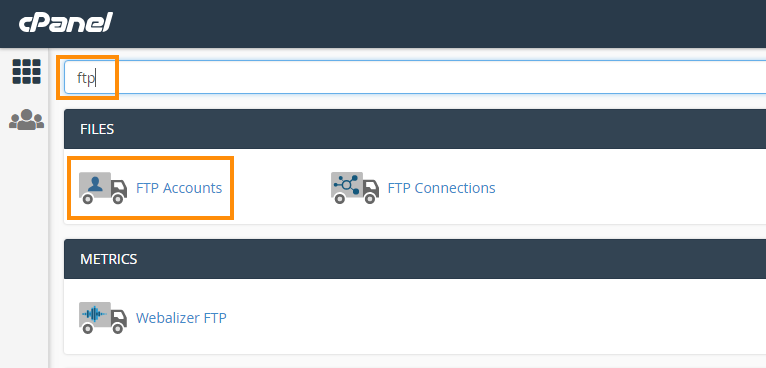
step 2
search for ftp in the search bar and select "ftp accounts"
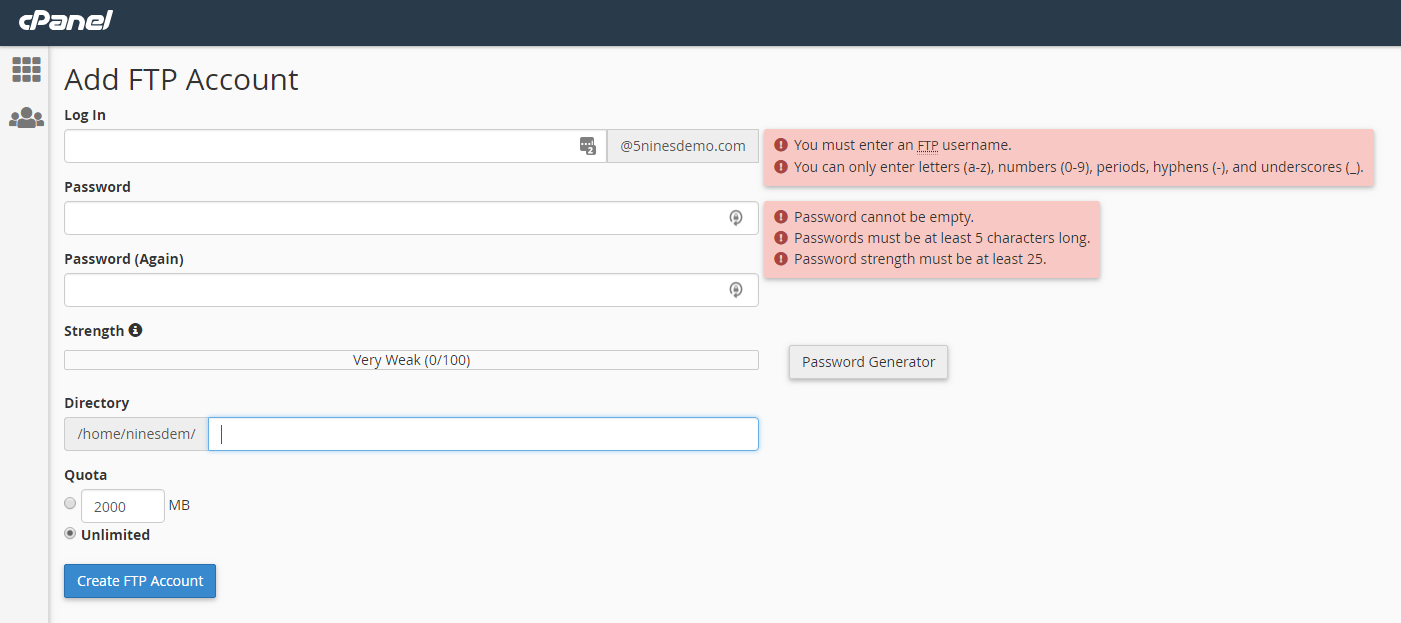
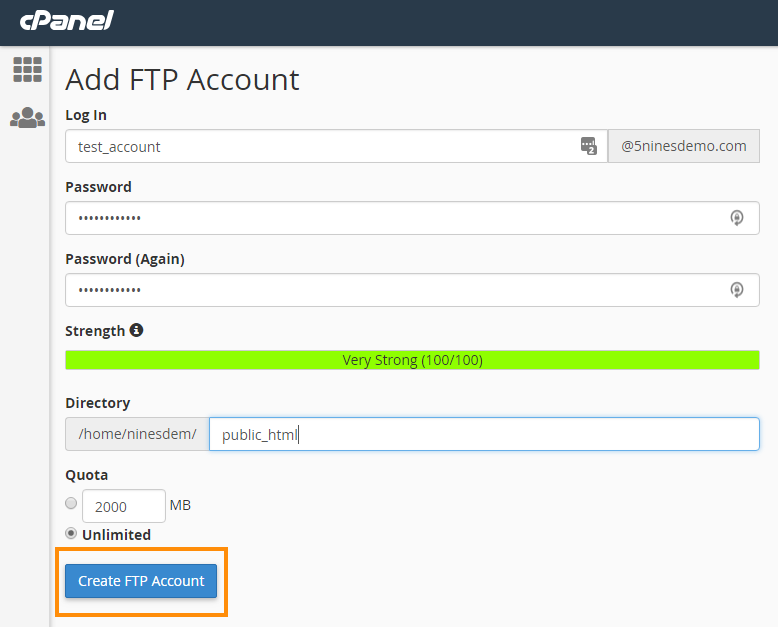
step 3
at the top of the page it gives you an option to create an account, make note of the username and password requirements
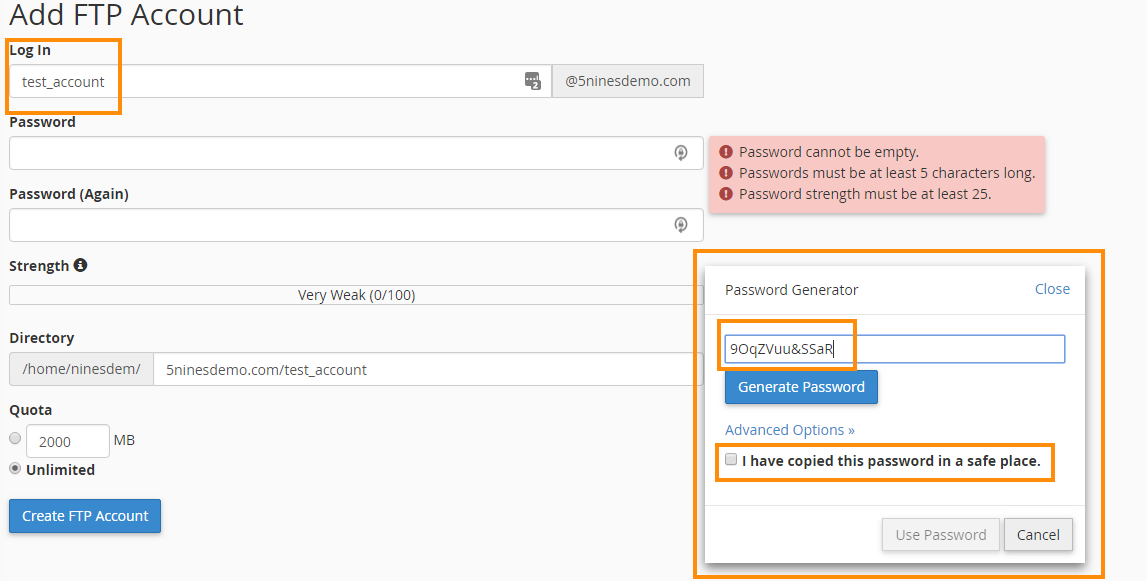
step 4
create the username. if you have problems coming up with a password, use the password generator.make sure you copy this password and put it in a safe place like a password manager(you will not be able to recover this password, but you can reset it). check the box and click on "use password"
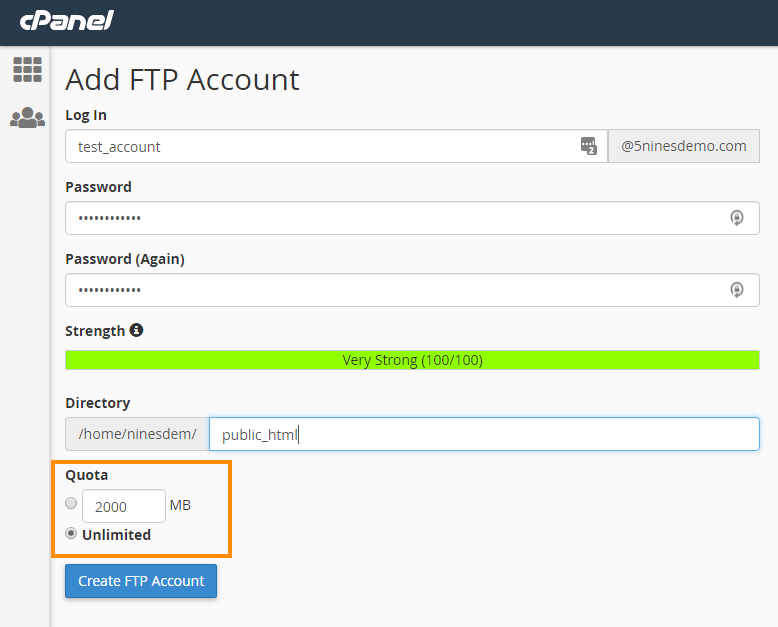
step 5
choose the directory this account will have access to. to have access to your root hosting files, you can leave this empty. "public_html" will be your website root.this cannot be changed. if you need to change it, you will need to re-create the account.

step 6
choose the disk quota for this account. this is the amount of disk space this account can use. please note that even if this account is set to "unlimited" it is still limited to your overall package disk space.
step 7
select "create ftp account'
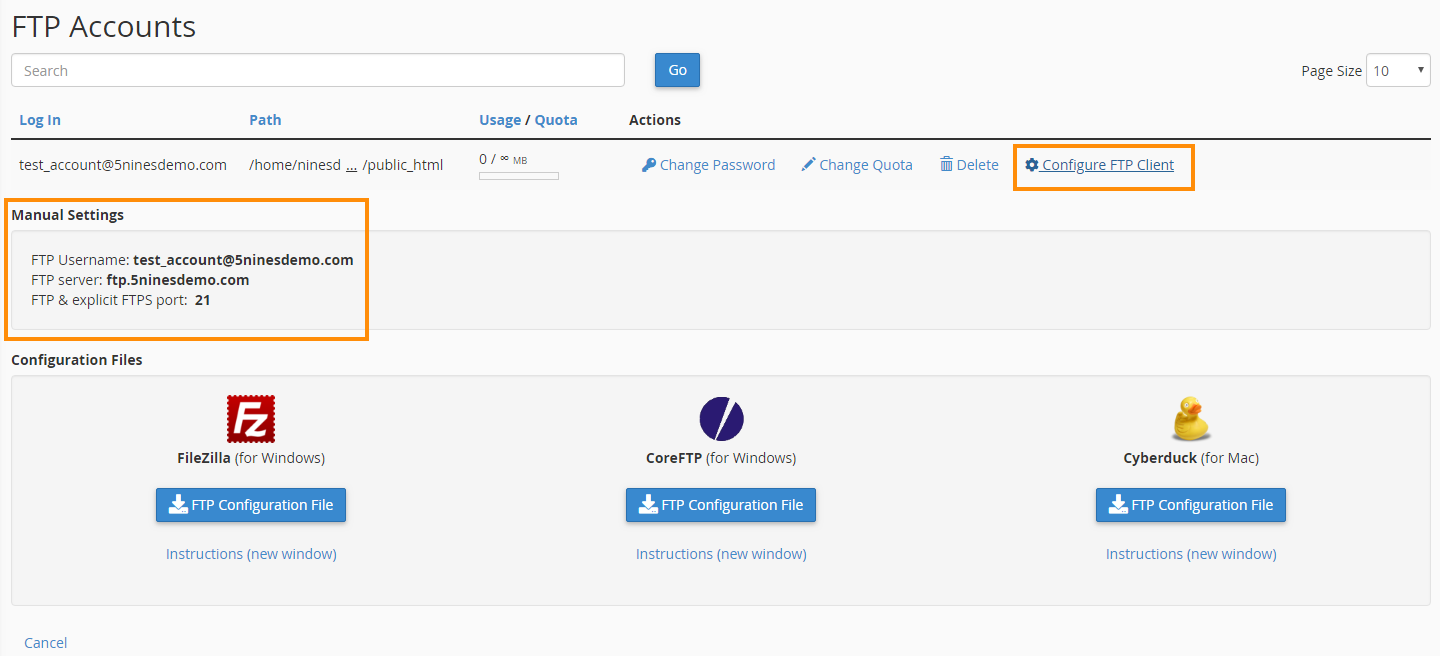
step 8
once the account is created, you can pull up the account information under the "ftp accounts" heading on the same page. click on "configure ftp client". the manual settings will be listed below.
*ftp through coreftp is no longer supported, you must use sftp to connect to your account.
step 9
this snippet is from a program called winscp, but the settings are basically the same from client to client. select your protocol (ftp), your encryption (tls/ssl explicit), your port (21), and type in your ftp address. then click on "login" (this may also be "connect" depending on your client)

step 10 (optional)
connecting with sftp
to connect with sftp instead of ftp you must log in with your cpanel/Design.Garden account and not the ftp account that was configured in steps 2 through 8. you will need to change the file protocal of your ftp client to sftp as well.

